Purpose
Quickly create shear panels and blocks in layout.
Steps

1. On the Truss Placement menu, select Next Truss.
The Next Truss dialog displays.
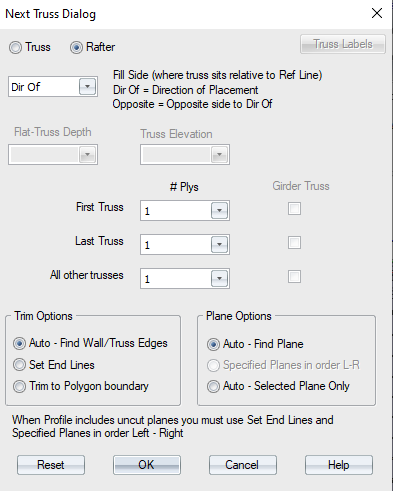
2. Define settings for the truss and click OK.
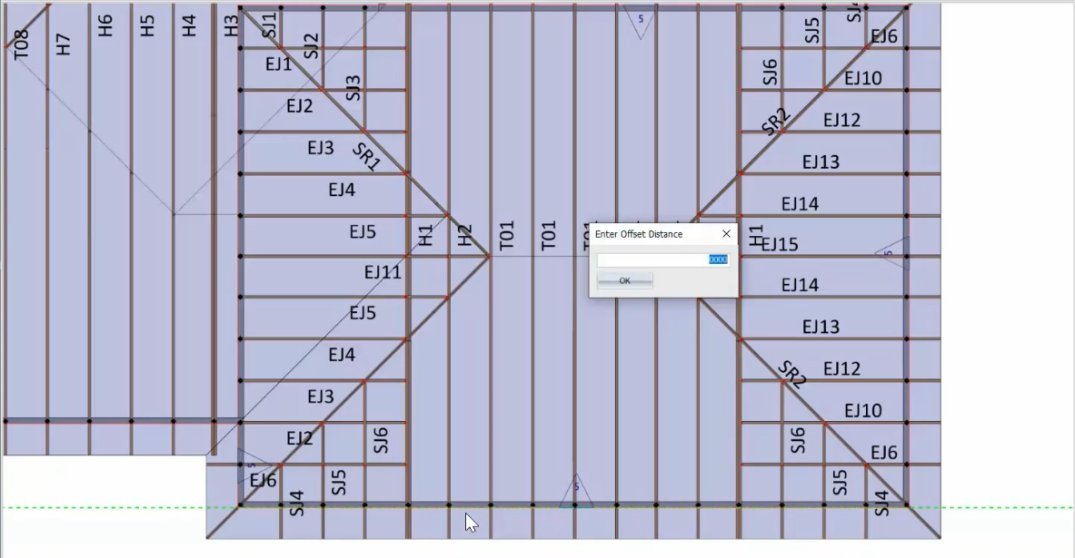
The following prompt displays: 
3. Create a reference line to position trusses and enter an offset, if desired.
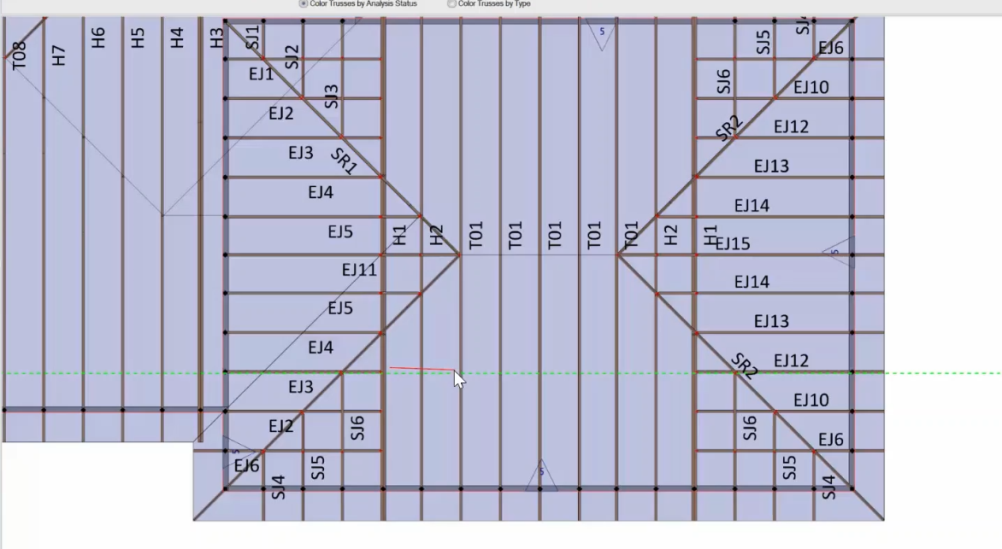
4. Drag a line parallel to the reference line on the side where you want to add the panels.
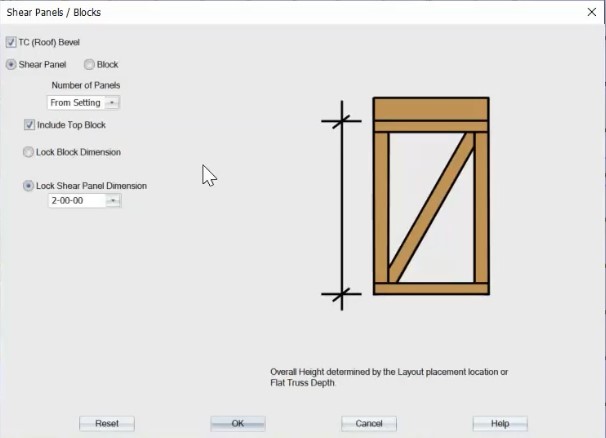
The Shear Panels/Blocks dialog displays.
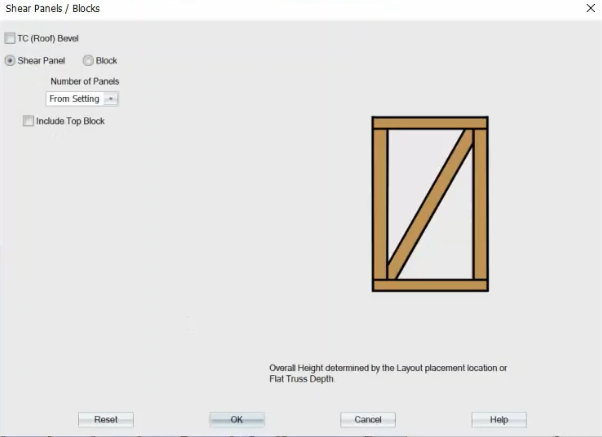
The following options are available:
-
Block - check to create blocks (blocks, unlike shear panels, do not have webs). Blocks can also be stacked or used as single blocks. When you select this option, additional options display:
-
Use common span for all blocks - choose this option to use the same size blocks for all locations on the truss.
-
Auto Block Sizes - lets Truss Studio select the block size using lumber in inventory.
-
Lock Top/Bottom Block Dimension - select to create a stacked block. The application forces the block size you select.
-
-
Number of Panels - Select an option from the dropdown list. Forces the number of panels you select. The From Setting option uses the setting specified in EnvData > Geometry > GeometryControls > Shear Panel vertical panel length.
-
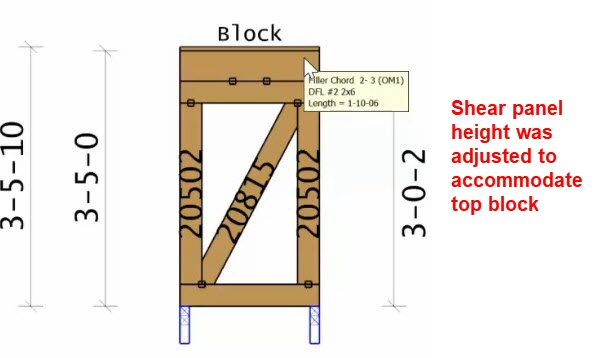
Include Top Block - Include a top block on the shear panel. When you select this option, additional options display:
 Note: You may want to turn off visibility of labels until you finish adding all shear panels. Click the Label icon
  to toggle labels on/off.
Note: In the Truss Properties pane, trusses that were created perpendicular to existing trusses have the Truss Shear Panel field set to Yes.
